There won’t be a single line, so let’s get ready to read the letters. And a little work with our hands. Oh, well, a little bit more, a little bit of brain 🙂
Step One.
First, remove the old node and all its tails (if you want you can make a backup copy of the keys)
sudo systemctl stop massad
rm -rf $HOME/massa
rm -rf /etc/systemd/system/massad.service
rm -rf /etc/systemd/system/multi-user.target.wants/massad.service

No, your eyes are fine, you inserted the command, pressed Enter, and nothing happened in response. But be sure that your previous node went “to the rainbow”.
Step Two.
Go to the root directory
cd /root
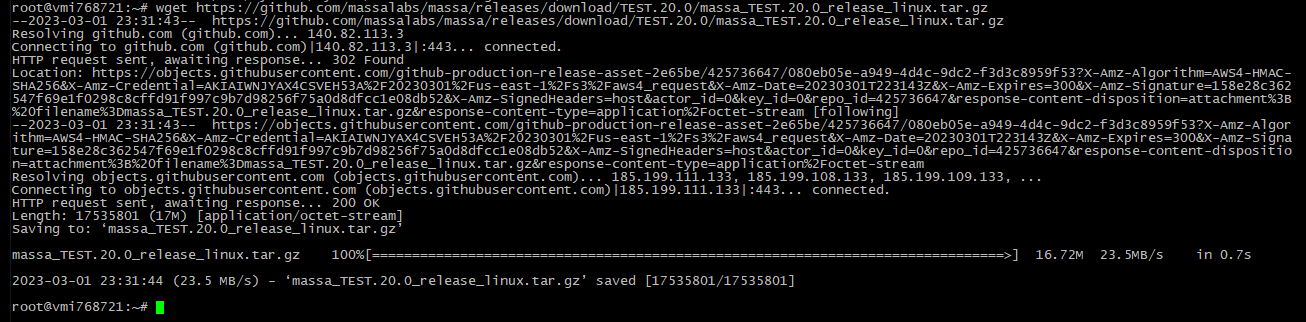
Downloading ready-made binaries from the official githab
wget https://github.com/massalabs/massa/releases/download/TEST.26.1/massa_TEST.26.1_release_linux.tar.gz
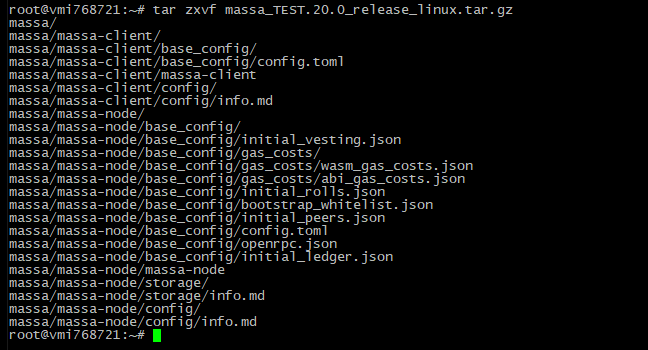
Unpack the downloaded archive
tar zxvf massa_TEST.26.1_release_linux.tar.gz
You won’t believe it – but that’s it! You’ve installed a node. Congratulations!
Step Three
Before starting the node, write the ip-address of your server in the configuration file:
(The code block below must be copied and pasted into the command line all at once, not line by line)
sudo tee <<EOF >/dev/null $HOME/massa/massa-node/config/config.toml
[protocol]
routable_ip = "`wget -qO- icanhazip.com`"
EOF

Step Four
Start the node and come up with a password:
cd $HOME/massa/massa-node/ && ./massa-node

Think of a password, enter it again to check and press Enter.
If you did everything correctly you will see your node started
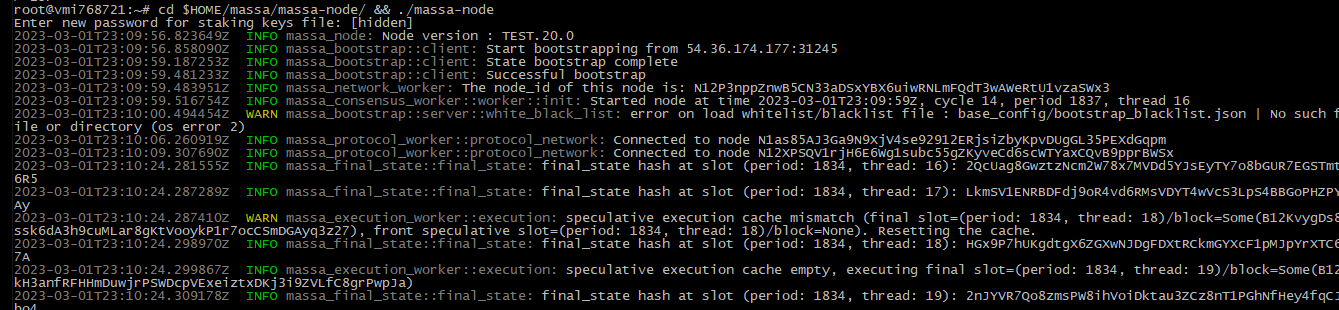
But we shouldn’t relax yet. Everything is just beginning.
Stop the node with Ctrl+C
Step Five
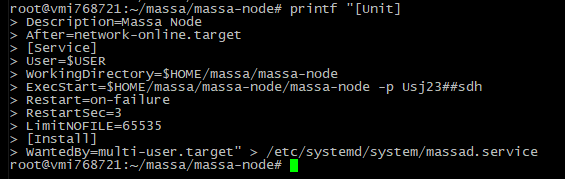
Create a service file so that your node does not stop after you close the terminal
Note – replace the word YOUR_PASSWORD with the password you just made up for the node
(The block below should be copied beforehand into Notepad, replace the word YOUR_PASSWORD and paste all at once, on the command line, not line by line).
printf "[Unit]
Description=Massa Node
After=network-online.target
[Service]
User=$USER
WorkingDirectory=$HOME/massa/massa-node
ExecStart=$HOME/massa/massa-node/massa-node -p YOUR_PASSWORD
Restart=on-failure
RestartSec=3
LimitNOFILE=65535
[Install]
WantedBy=multi-user.target" > /etc/systemd/system/massad.service
Restart the node from the service file.
sudo systemctl daemon-reload
sudo systemctl enable massad
sudo systemctl restart massad

Check that the node works properly
sudo journalctl -f -n 100 -u massad
If you see a similar picture, all is well – the bootstrap went well
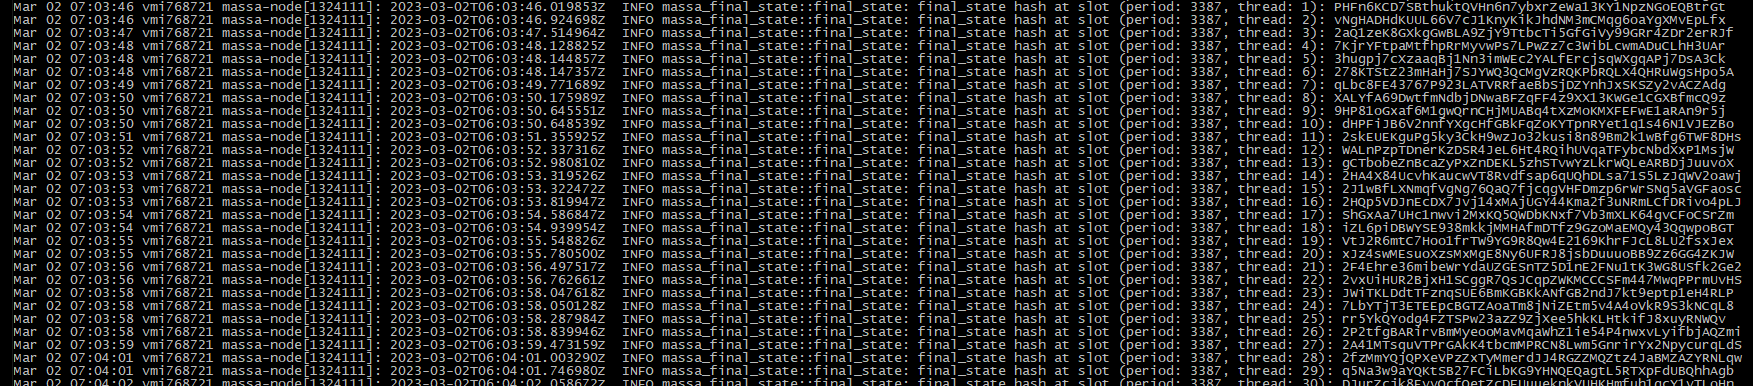 Exit the logs with Ctrl+C
If you see a different picture
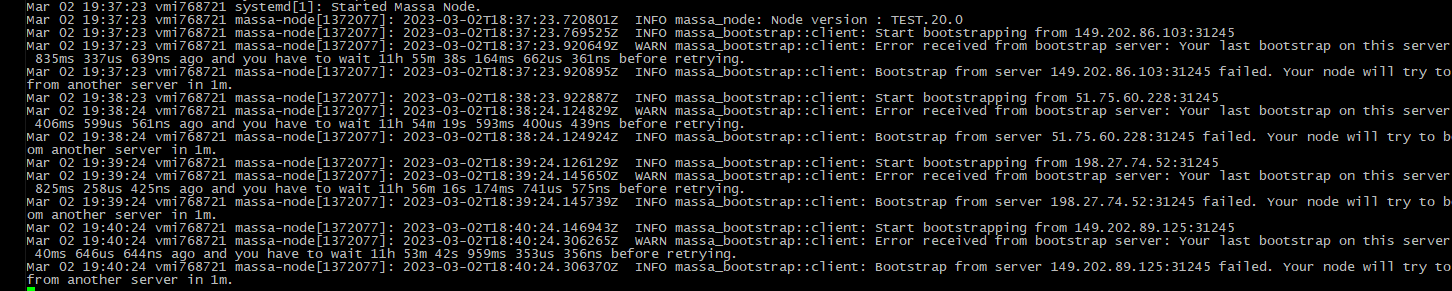
You’re out of luck – your node is not zabutstrapped. You either have to wait or “light up” your friend’s node. How to do this you can read in this article
You can, in principle, continue to install, but all the same if the node will not start up in the end – you will get stuck
Now on to setting up the client/wallet
Step Six
Launch the client for the first time. It will ask you, like Noda, to come up with a password. (I “came up with” the same as on the node, although it is probably not quite right)
cd $HOME/massa/massa-client/ && ./massa-client
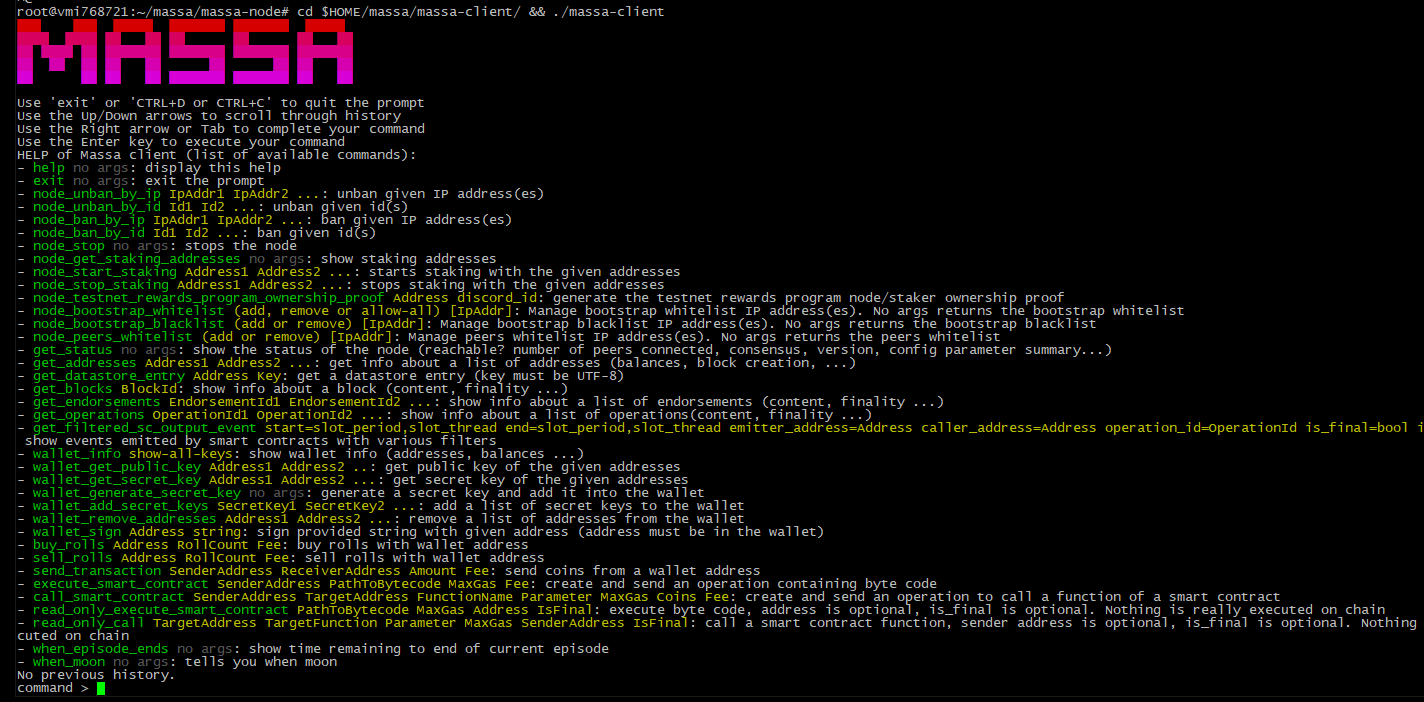
Next, we need to generate a new wallet with all the keys. To do this we enter the command
wallet_generate_secret_key
You will be prompted for a password when you run the first command. After that
You will be shown the address and reminded that it would be a good idea to register a wallet address for stacking coins.

Well, since they are asking, let’s just do what they are asking for
To do this in the client give the following command:
wallet_info

see the wallet address and add it for the steak
node_start_staking <your wallet address>

Check that the wallet address is “staked”
node_get_staking_addresses

Exit the client by typing Ctrl+C
And then check that the node is in order
cd /$HOME/massa/massa-client/ && ./massa-client wallet_info

Step Seven
Go to the discord section with the name
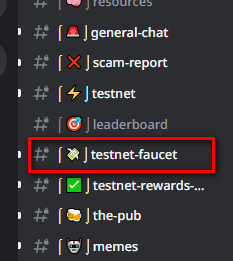
And request coins for your wallet address

If the faucet does not glitch – coins on your wallet will be in 20 seconds (if it glitches – up to an hour)
cd /$HOME/massa/massa-client/ && ./massa-client -p YOUR_PASSWORD wallet_info
![]()
All that’s left is to buy a roll for our coins.
Logging into the client
cd /$HOME/massa/massa-client/ && ./massa-client -p YOUR_PASSWORD
and in the client we buy a roll with the following command
buy_rolls your_wallet_address 1 0
In my example it looks like this
buy_rolls AU12GoSDG9QeWceUtPvF8D7GimHr4oeFzSc9vFRGDthFX7VfTdTmp 1 0

And without leaving the client give the command wallet_info making sure that the roll is bought
![]()
After about 1 hour and 40 minutes, the roll will become active and the steaming of the coins will begin.
(I highly recommend not to have more than 1 active roll. There are no pros and cons, but this is not the topic of this article)
Register a node in Discord:
To register we will need to know the ip address of your server and your user_id on the discord server.
The ip address of the server we see the command in the console
wget -qO- eth0.me

Now go to MassaBot in discord and just “feed” your ip to the bot
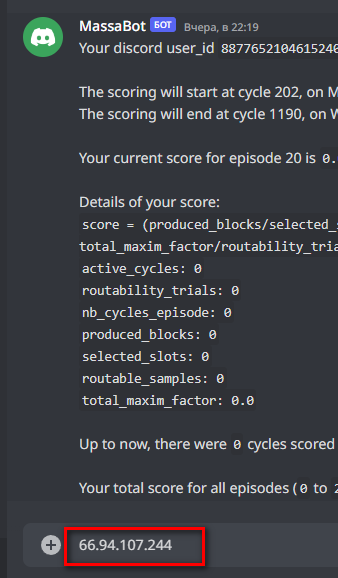
Press Enter and see that your discord account is registered to your ip.

Great.
Now we will register the node itself. We will need user_id. You can see it right here. Let’s copy it and go back to the server.
Launching our client
cd /$HOME/massa/massa-client/ && ./massa-client -p YOUR_PASSWORD
And inside the client we give the following command
node_testnet_rewards_program_ownership_proof <wallet address> <id from discord>
In our example, the command would look something like this
node_testnet_rewards_program_ownership_proof AU12GoSDG9QeWceUtPvF8D7GimHr4oeFzSc9vFRGDthFX7VfTdTmp 887765210461524028

In response, you will get a long key, which you have to copy and paste into the discord, in MassaBot
If all went well, the info command MassaBot should give you a similar picture

where you will see your Node ID, Staking Address and IP address
Now check that the data in the discord matches the data in our node
cd /$HOME/massa/massa-client/ && ./massa-client -p YOUR_PASSWORD get_status

The Node ID and IP address must match what you see in the discord.
This concludes the installation of the node.
What else to read on the subject:
Контроль за падением rolls и автоматическая их покупка
Massa – как “прикурится” от ноды друга
Creating Your Own Info Bot in Telegram
Костыль для 8 эпизода ноды massa
Утечка памяти — определяем — перегружаем ноду