As the saying goes – All people are divided into those who have already lost some information and now already make backups, and those to whom it has not happened yet. But it’s temporary.
Therefore, let’s consider a script that will send you once a week the configuration of your microt and backup to your e-mail.
(In such scripts, as a rule, the password is specified in the open form from the mail to which you will send backups, so I highly recommend that you create a separate mailbox for these purposes, and from it you can configure the forwarding to the main e-mail).
Or use for these purposes a box on Gmail. But to configure everything as it should – will have to perform some dance with tambourines. In exchange for security. So, if you are ready to perform some shamanic ritual – welcome. If not, choose a simpler mail server.
Step 1: Enable two-factor authorization.
The thing is that when you send mail via smtp.gmail, the password you use to log in to your mailbox will not work. You’ll need to create a special one. For a specific action.
For this purpose, two-factor authentication must be enabled in your Gmail account. Otherwise, the desired section of the menu will simply not be available.
To do this, let’s do the following steps.
Go to your Gmail inbox and go to the Account section.

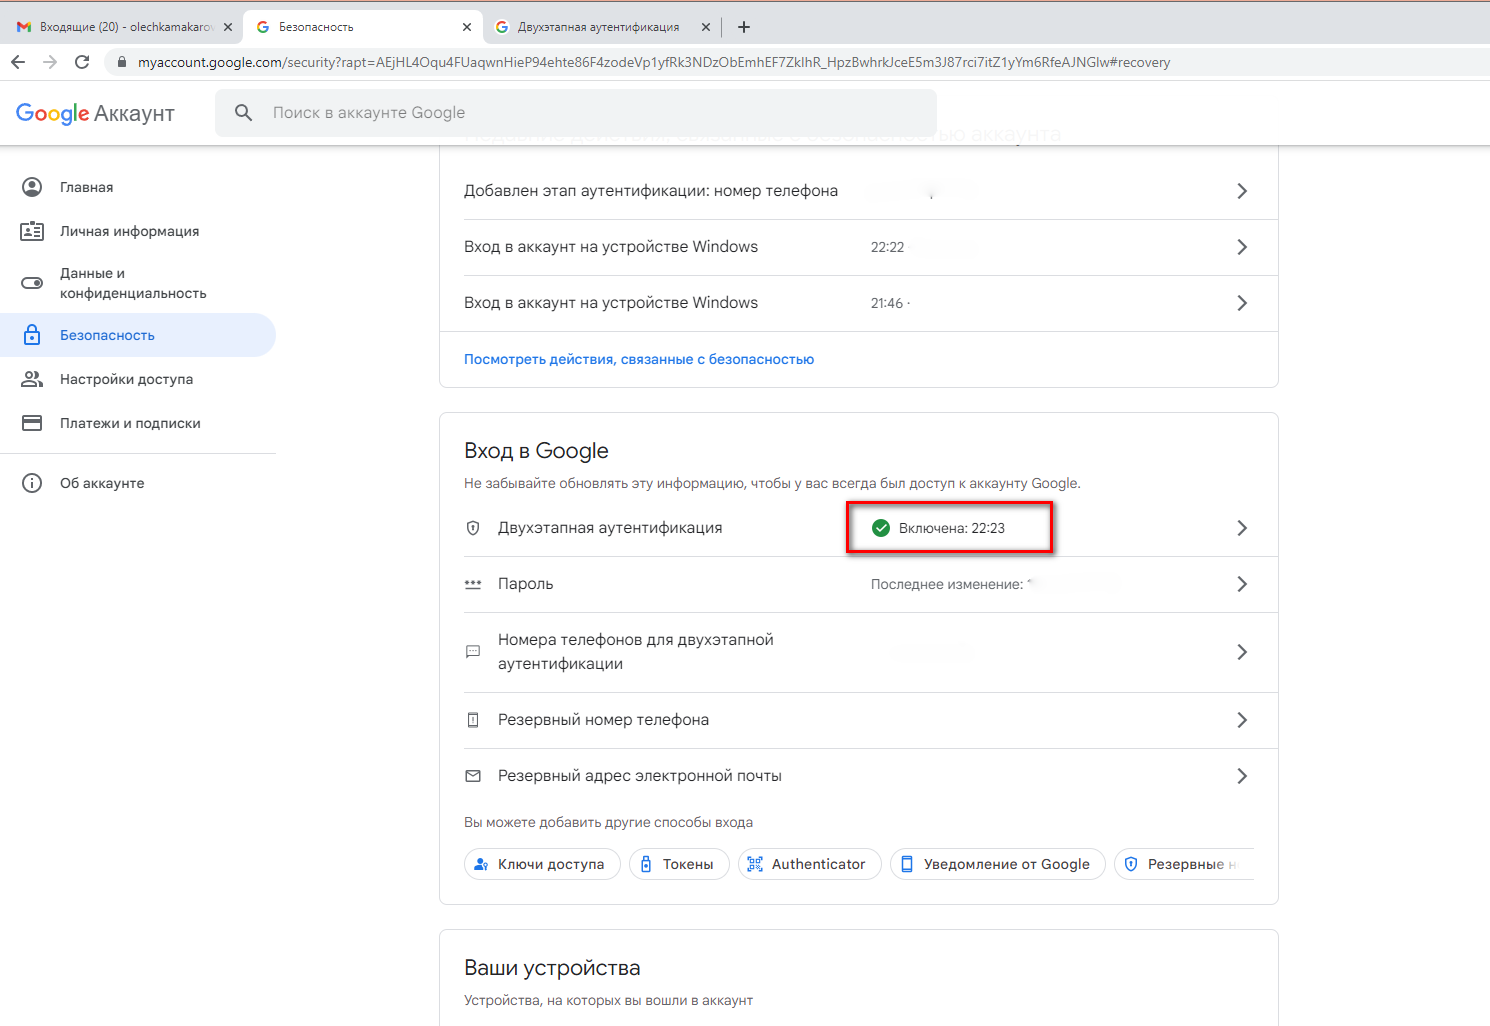
Go to Security and see that two-step authentication is disabled. (If you already have it enabled, go to the next step).
Click on this section and on the next page you will be told how great it is that you will have it soon. We click on a single button labeled Start. Then we will be asked to enter the password from the account once again and offer to accept sms to the phone number to which this account is bound to
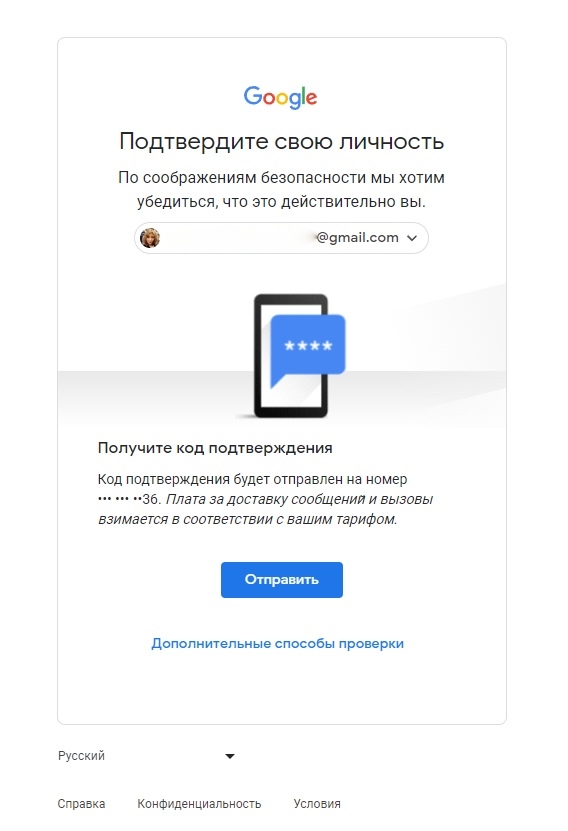
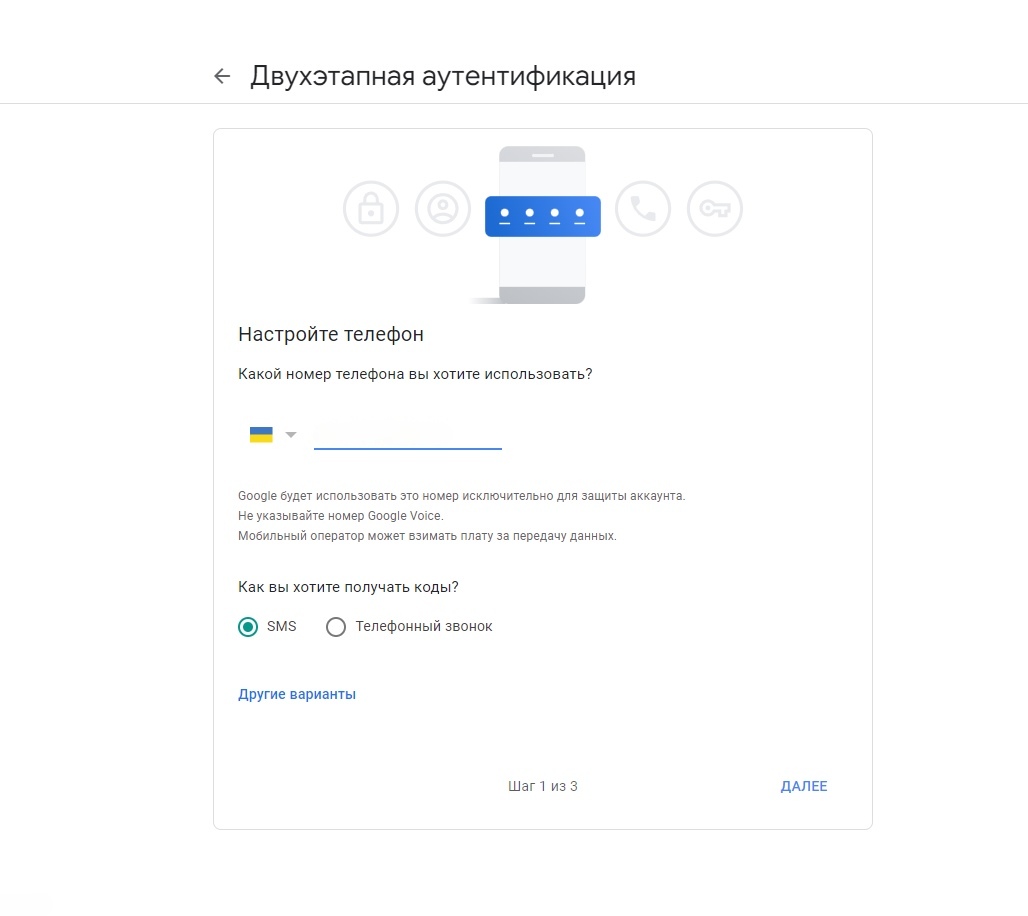
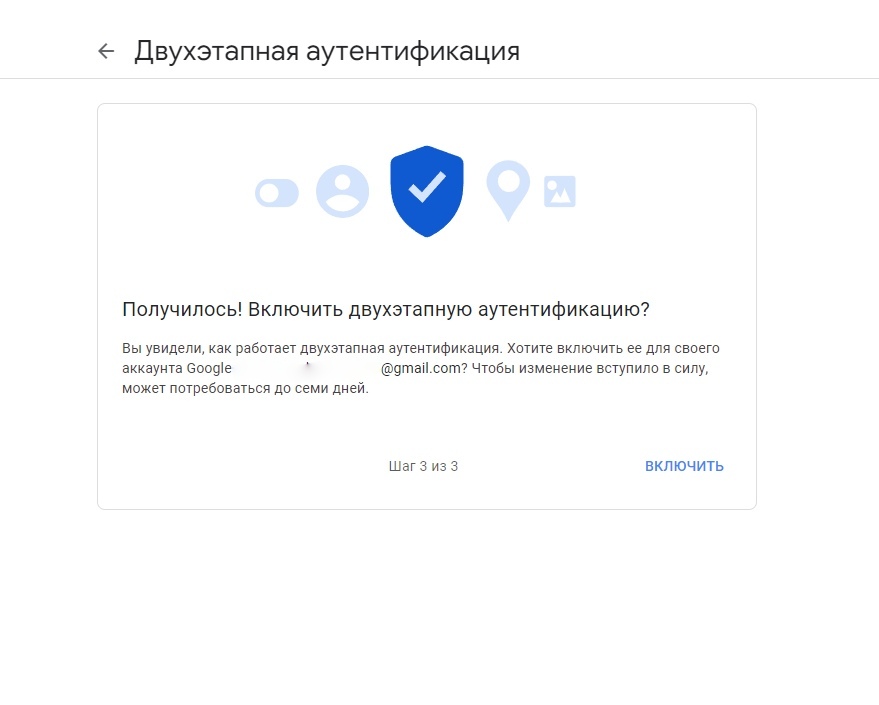
After you receive the sms and enter the code in the corresponding field, you will be offered to enter the number to which the sms will be sent if you suddenly decide to log in to your account for the first time from a new device. By default, the phone that is bound to the current mailbox is pulled up. Click Next and get a message that all preliminary actions have been completed successfully, and now we can finally enable two-step authentication. Click Enable and we are returned to the Account, where we can see that this option is enabled
Step 2: Obtaining an access code
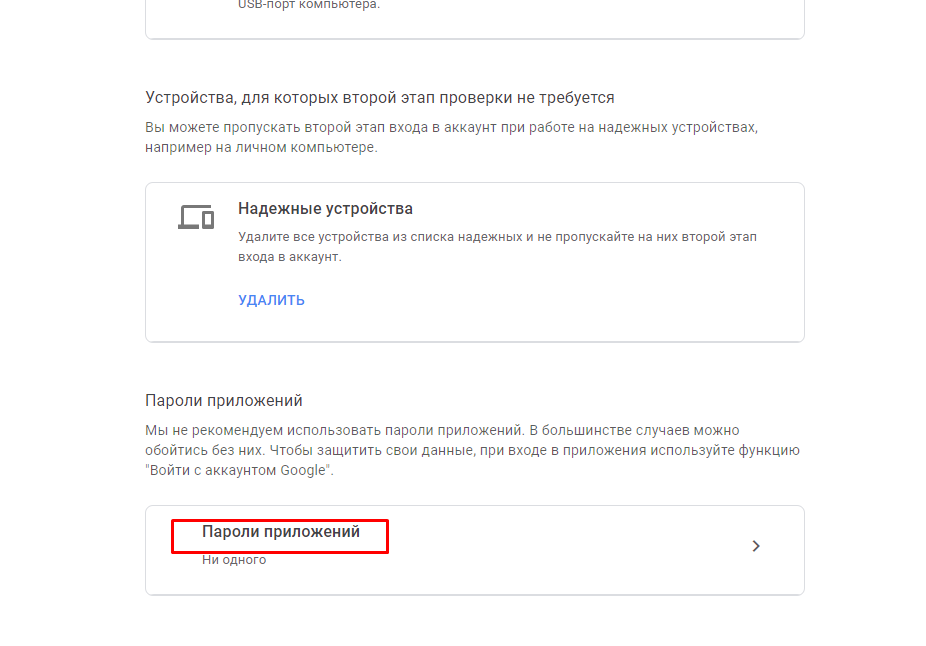
Click on the Two-step authentication section. Once again we are asked to enter our account password. After that we get to a page with different settings. Go down to the bottom and find the Application Passwords section. Go to this section
Click on Application and select Other from the drop down menu.
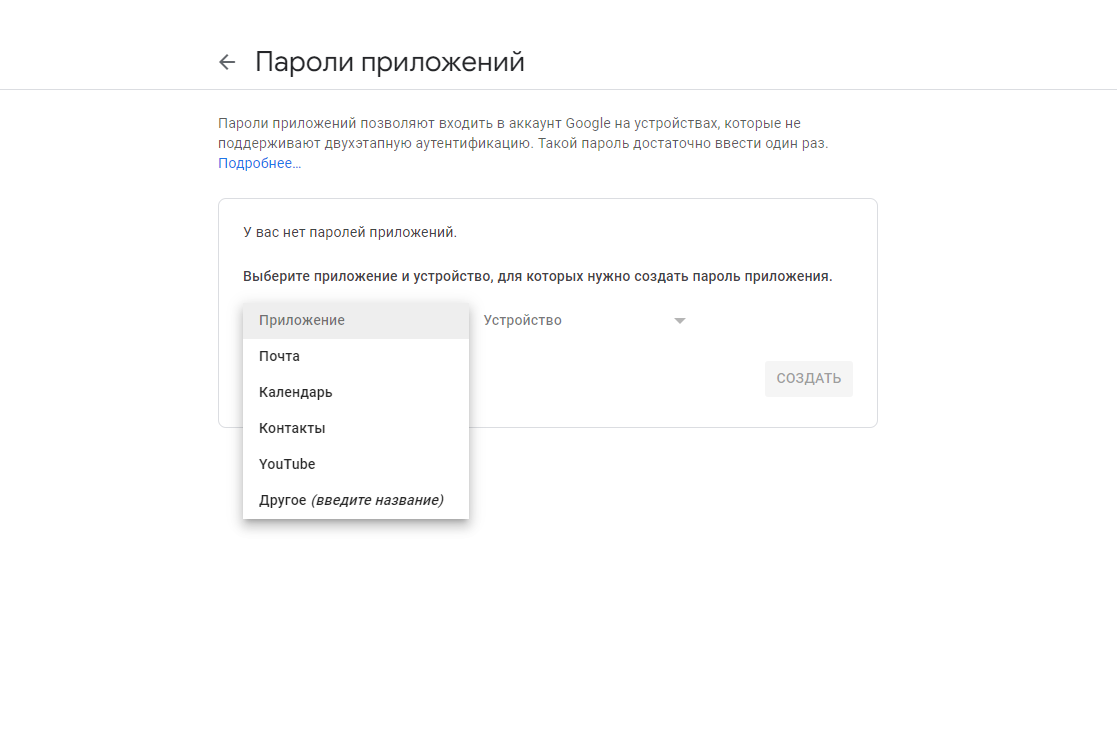
Think of an arbitrary name and click the Create button.
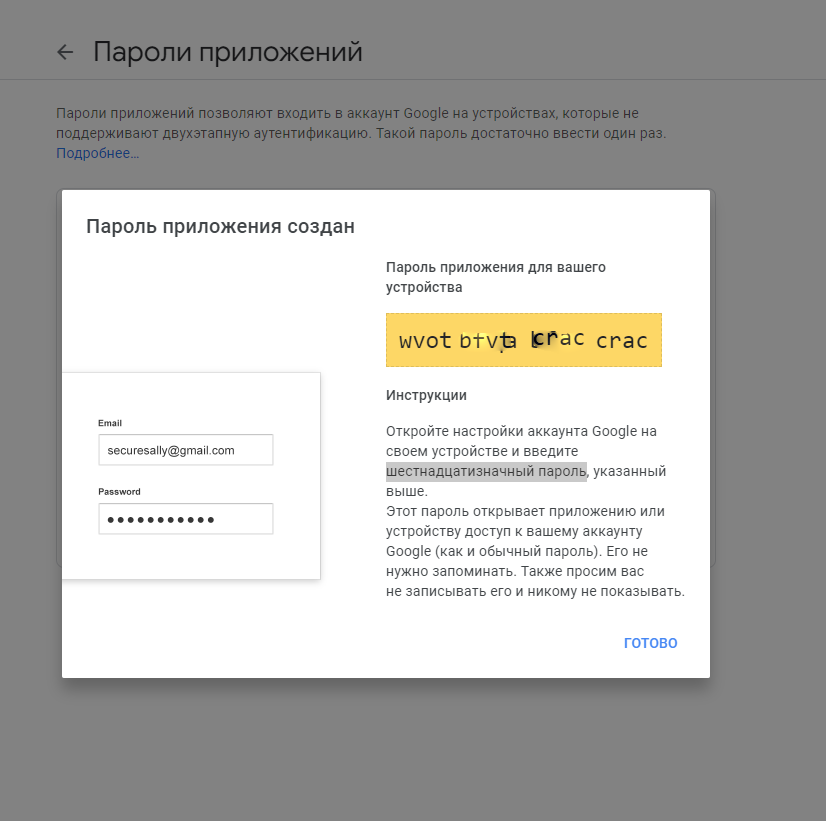
A sixteen-digit password will be generated. Copy it to Notepad This is the password we will need to send our backups from Mikrotik.
That’s the end of Gmail. Now let’s move on to the settings of Mikrotik itself
Step 3: Check that Microtik sends the test e-mail normally.
Before we go to all the trouble with the script, let’s first check that Microtik sends anything to our mail.
Go to Microtik, select Tools-Email- Send Email. A form for sending a one-time e-mail will open. That’s what we need to check
Fill in the fields as follows:
Address: IP of the server used to send mail (173.194.220.108). For some reason the standard smtp.gmail.com didn’t work for me. I’m too lazy to figure it out at the moment, so I use the ip
Port: Server port 587
User: Here we specify the full address of our mailbox on gmail in the format login@gmail.com.
Password: The same application password we got in Gmail.
TLS: start tls
From: The e-mail address on behalf of whom the e-mail will be sent.
To: To whom we are sending the email. Here we specify the full address of our gmail mailbox. Or any other
Subject: Subject/Title of the e-mail
Body: The text of the email itself
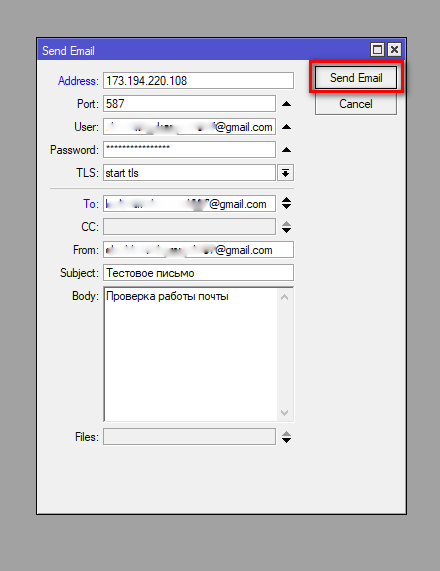
Click the Send Email button and if Microtik has not cussed at anything, go to the mailbox and check if the letter has arrived.
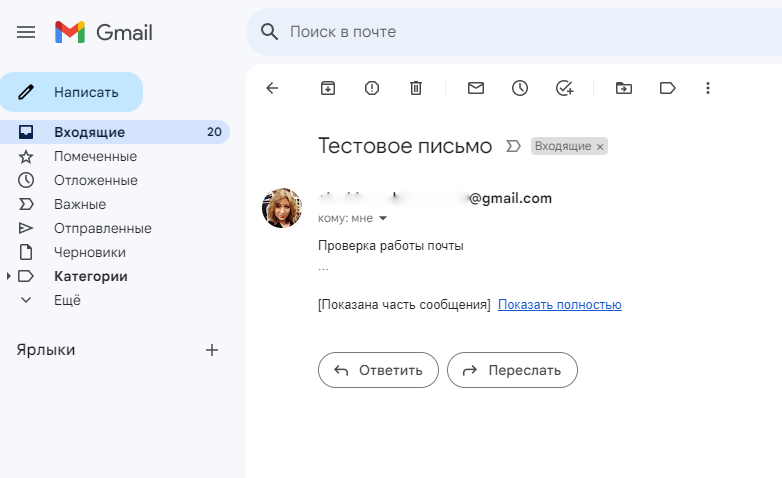
Great! The one-time email went through. Now you can transfer these settings to a permanent form.
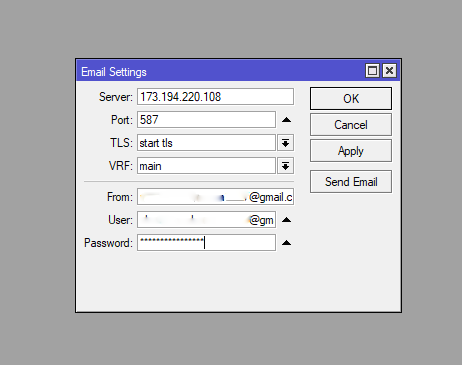
Once again select Tools-Email and transfer the data from the one-time form to the permanent one. Click Apply-OK and this is the end of one more stage of customization
Step 4: His Majesty the script.
Below is the script that you need to paste into the appropriate field, making the only change – specifying your e-mail address.
The script works on both version 6 and 7 of Mikrotik.
{
:log info "starting backup process...";
:local sysver [/system package get routeros version];
:local sysname [/system identity get name];
:local rbmodel [/system router get model];
:local rbuptime [/system resource get uptime];
:log info "flushing DNS cache...";
/ip dns cache flush;
:delay 2;
:log info "deleting latest backups...";
:foreach i in=[/file find] do={:if ([:typeof [:find [/file get $i name] "$sysname-"]]!="nil") do={/file remove $i}};
:delay 2;
:log info "creating backup file...";
:local backupfile ("$sysname-" . [:pick [/system clock get date] 7 11] . [:pick [/system clock get date] 0 3] . [:pick [/system clock get date] 4 6] . "-v$sysver" . ".backup");
/system backup save name=$backupfile;
:delay 2;
:log info "creating script file...";
:local exportfile ("$sysname-" . [:pick [/system clock get date] 7 11] . [:pick [/system clock get date] 0 3] . [:pick [/system clock get date] 4 6] . "-v$sysver" . ".rsc");
/export show-sensitive file=$exportfile;
:delay 2;
:local files ($backupfile,$exportfile);
:log info "sending files via email...";
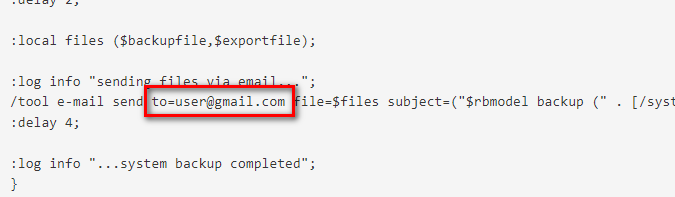
/tool e-mail send to=user@gmail.com file=$files subject=("$rbmodel backup (" . [/system clock get date] . ")") body=("$sysname backup files are in the attachment.\nTime and Date: " . [/system clock get time] . " " . [/system clock get date] . "\n\nModel: $rbmodel\nRouterOS: $sysver\nUptime: $rbuptime");
:delay 4;
:log info "...system backup completed";
}
This is the specific place where you should replace the user login, with yours
Briefly what the script does.
First it takes the name, model, OS version, current time of your router into variables. All this will be added to the email details and backup file names. This is very handy when you have more than one Mikrotik.
Then it deletes the previous backups and creates new ones in their place. Finally, it sends an email with backup files to your mailbox.
Step 5: Add a script to MicroTik
Choose System-Scripts from the menu. Press “plus” to add a new script. In the Name field specify the name of the script, in the Source field insert the script and press the Applly button. We will still need the name of the script, so copy it to yourself.
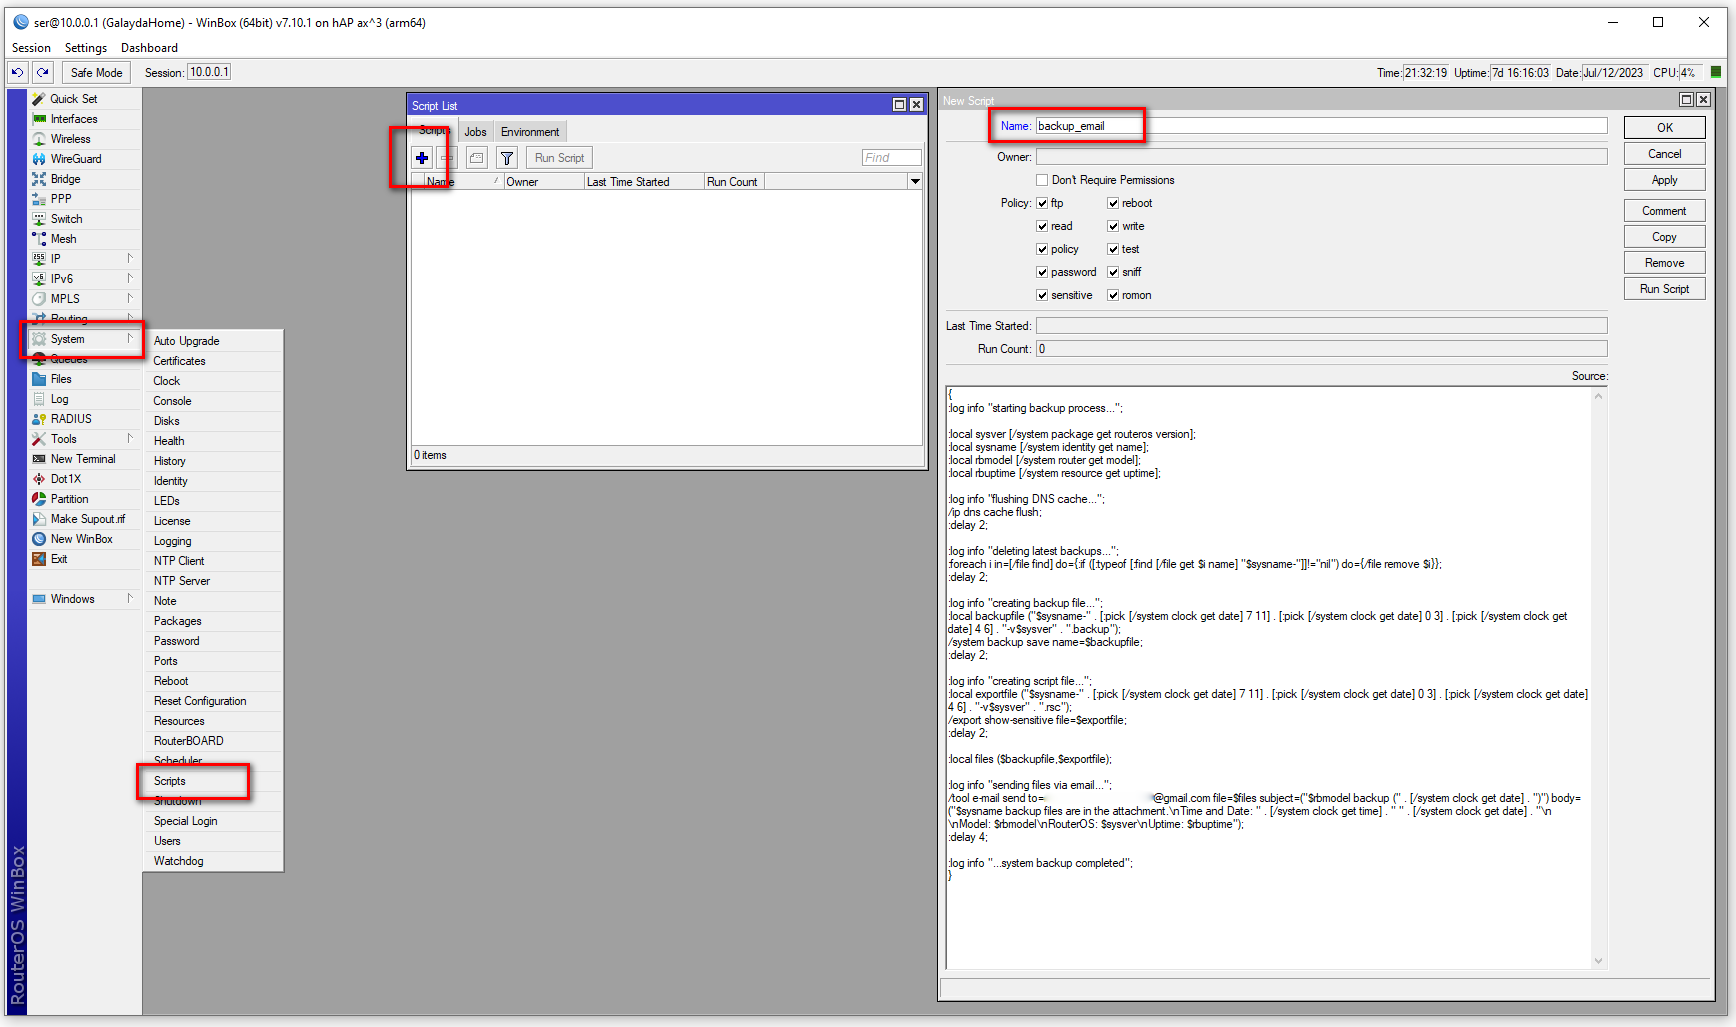
Now the important point. Click on the Run Script button.
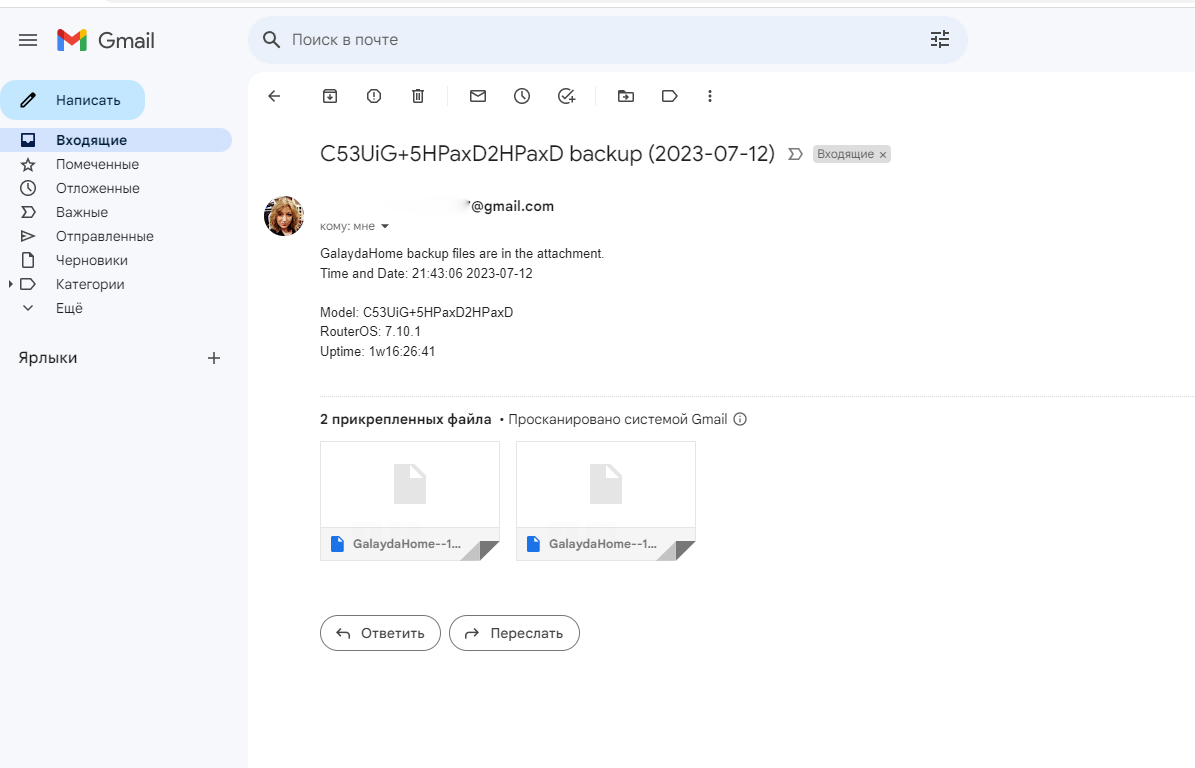
Wait 10-20 seconds and if you have done everything in the previous episodes without any errors, you will receive a letter with two files with our backups attached to it
Step 6: Configuring the scheduler
It remains to decide how often backups will be created and sent to email. You hardly need it every 24 hours, and once a month is also a big break. Let’s take 14 days as an example. Not too much and not too little.
To do this, select System-Sheduler in the menu and press the “plus” button to add a new task.
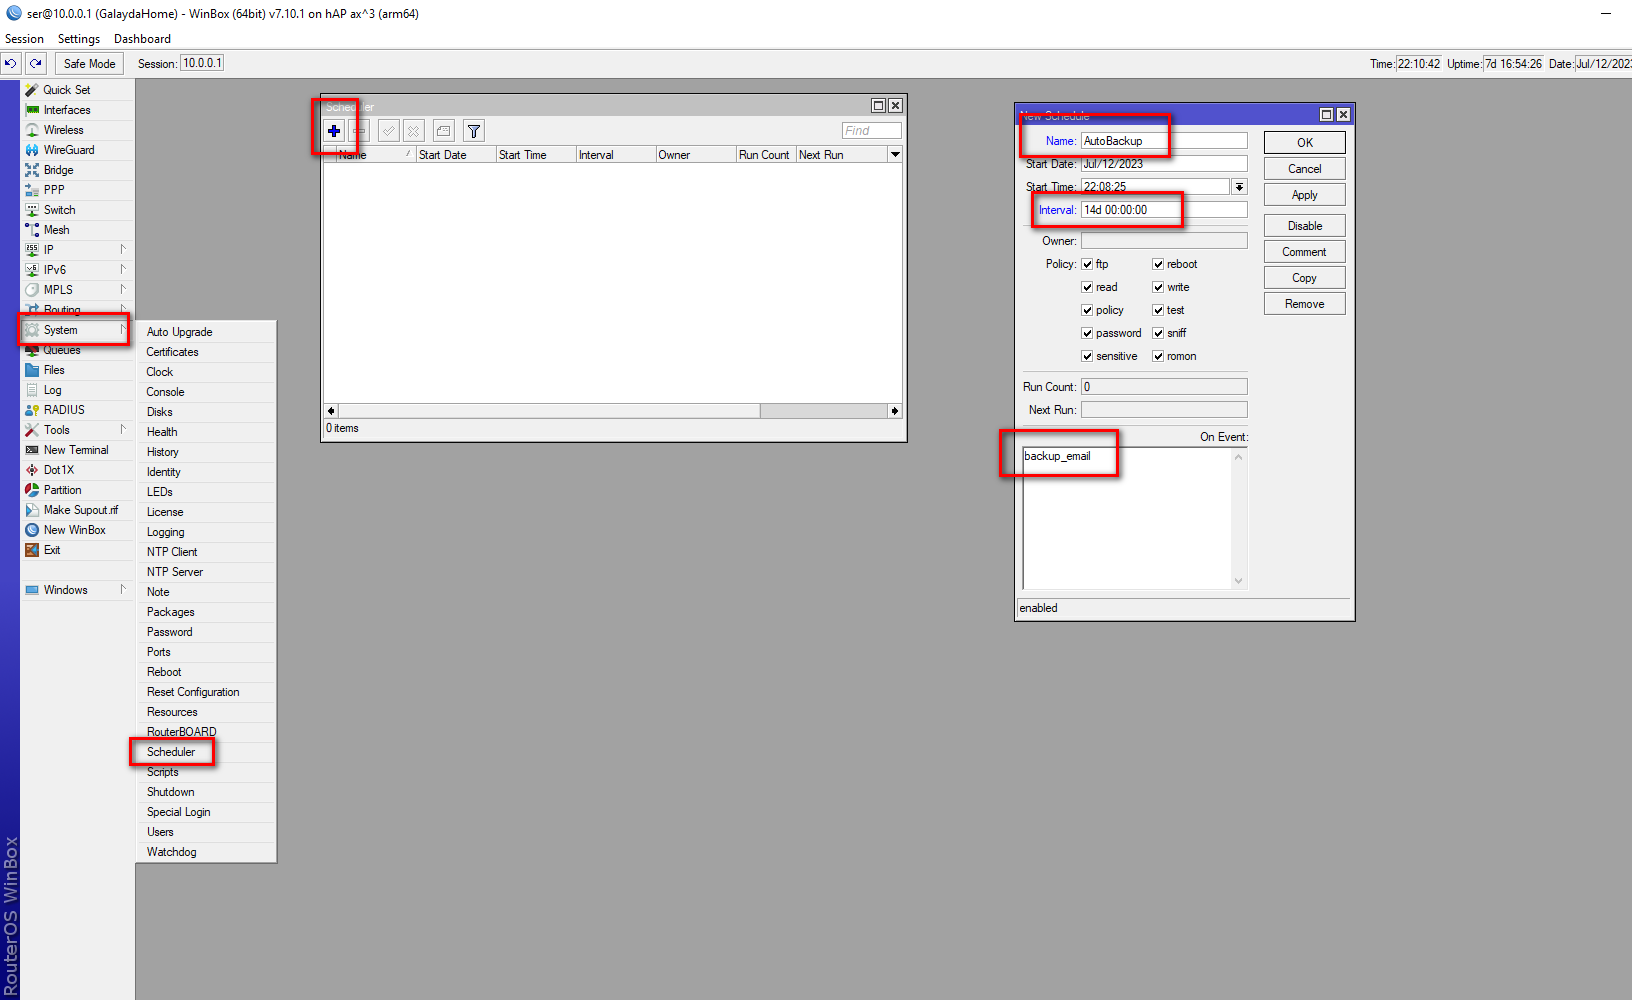
In the opened window customize task parameters:
in the Name field specify the name of the task, for example AutoBackup;
in the Interval field specify the frequency with which the script will be executed. We have specified the interval of 14 days. To debug the scheduler, you can specify an interval of 5 minutes and the current Start Time. And don’t forget to set the time on MikroTik in the System – Clock menu;
In the On Event field, specify the script to be executed. Remember, in the previous task we saved the name of our script. It’s time to remember it and insert it into this field backup_email;
click OK to save the task.
Step 7: Dance the jig.
This is the end of the setup in general terms. Why not definitively? Because you can still think about whether it’s right to send passwords in clear form in backups. By the way, this parameter is customizable and you can make it so that passwords are not displayed, and many other little things.
I was just trying to protect myself from “bad” work when the client’s router went down/burned out, and there was an office vpn to which dozens of employees were connected. And their accesses to the VPN, of course, no one saved anywhere.
For those who have doubts in the course of the guide – a small video of where and what to press
“Automated MikroTik Backup and Configuration Script Email Delivery”
“Emailing MikroTik Backups and Configuration Scripts: A Guide”
“Efficiently Send MikroTik Backups and Settings Scripts to Your Email”
“How to Email MikroTik Backup Files and Configuration Scripts”
“MikroTik Backup and Configuration Script Management: Emailing Solutions”
“Streamline Your MikroTik Management: Sending Backups and Scripts via Email”
“MikroTik Backups and Settings Scripts: Email Delivery Made Easy”